Sunday, January 30, 2011

Insulation installation

We are having the ceiling and basement walls insulated with foam.  Mike Moos with Gem 1 Foam Insulation in Westcliffe is doing the work for us.  He covered the logs with plastic to keep anything from getting on them, then started spraying the foam on.  Just getting started here.

A view of the center beam.

More than half-way done on the ceiling!  The blue dots are where the wiring was put in for the lighting.  We originally wanted to install can lighting, but the electrician wired for hanging lights.  We may go back and change that, I don't think it's totally decided yet. 

Looks like Mike takes good care to reduce his exposure to the foam.  That's a good thing; I'm sure that breathing it would not be a good idea.


Glad Mike isn't afraid of heights!

A view of the corner of the living room with the stovepipe.  I've been told that since the insulation was installed, the wood stove has actually gotten the temperature up to over 50 degrees inside!  (When we came at New Years, we could only get the temperature to about 20 degrees, so that's a big improvement already.)  We still have to get the soffits under the eaves finished and the doors & windows completely sealed; when that's done the wood stove may be enough to completely heat the cabin, although we do have a furnace also.  But I really love a wood stove!


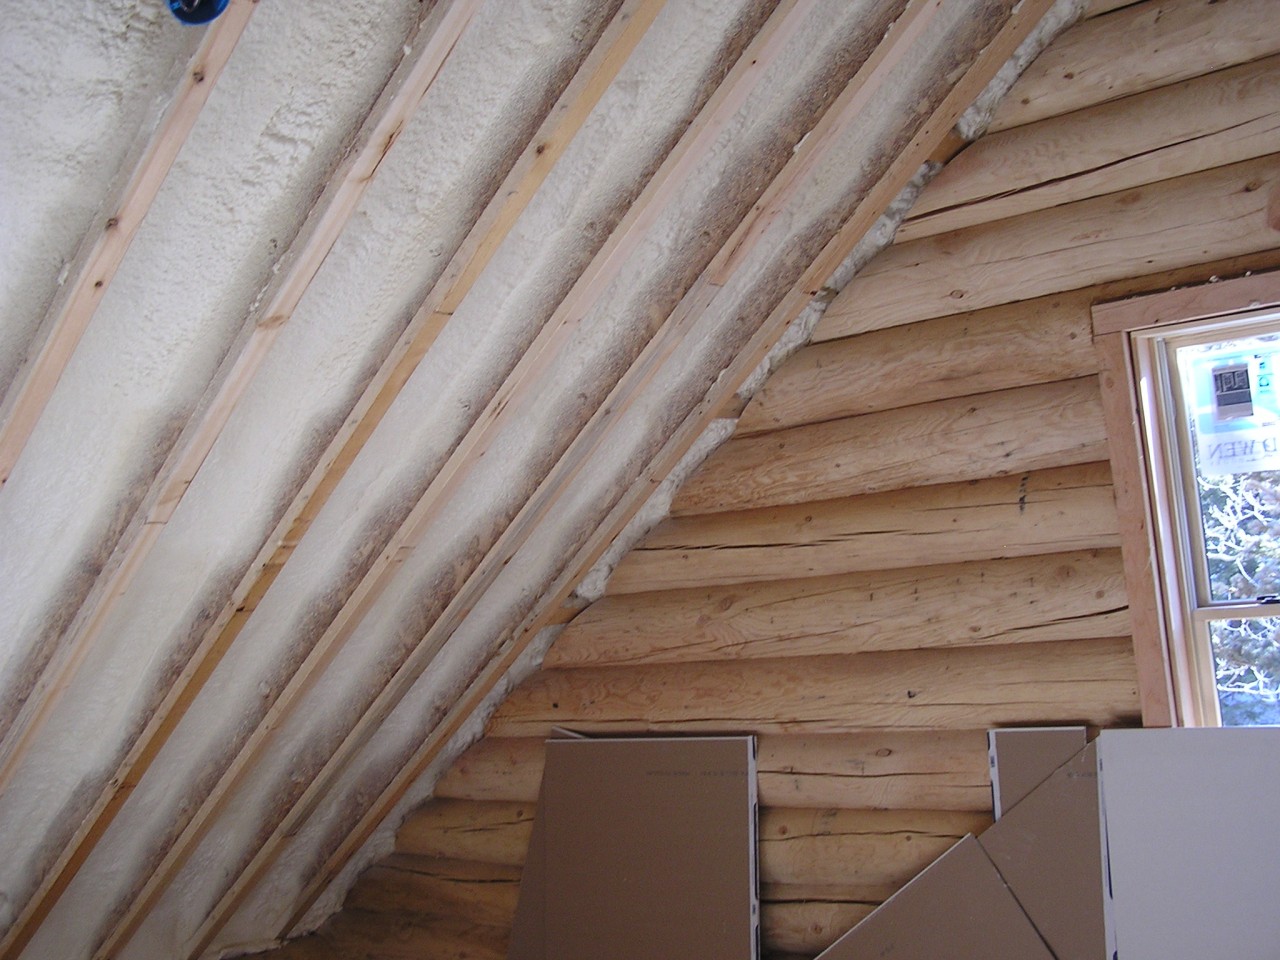
The foam is applied at a 5.5" depth.  This gives us a 40 R-value.

I'm not sure, but I THINK this is in the basement.  This area will not be heated, it's where the cars, equipment room, etc. will go, but because the furnace is in the equipment room, we want it well-insulated also.

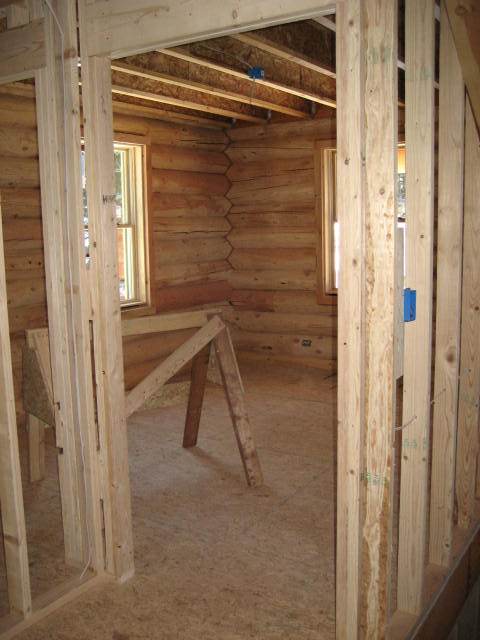
A view of the area in the loft where the roof meets the wall.  We'll be covering the foam insulation with tongue and groove aspen. 


This will be Don's & my bedroom.  I can hardly wait to come see it again!  (Spring break, here I come!)

This is the loft office.  I'm thinking we may put a TV up here and put in window seats.

Thanks Mike, we appreciate your hard work!

These are the fiberglass insulation blankets for insulating the bottom floor and some of the interior walls.  We decided it would be a good idea to insulate the walls separating the mud room and the kitchen, just to make things a bit more cozy and keep the noise level down.  We have another crew that is doing this part of the work.  Thank goodness, we have a family member who lives in Colorado Springs who is helping us with this part of the construction.  Thanks Mark, we couldn't do this without you!

A view of the kitchen/mudroom wall.


Inside the mud room.  We'll have a utility sink, washer/dryer, and lots of storage here.  The door on the right goes outside and down a flight of stairs to the front of the house.

A view of Highway 12, aka Highway of Legends.  As you can see, there's really not much snow this year (this picture taken towards the end of January 2011).  Big snowstorm predicted for Tuesday, Feb. 1, though; we'll see what happens!

Saturday, January 8, 2011

New Year's Day Ski

I took the opportunity to get in a quick ski on New Year's Day 2011, up the Blue & Bear Lakes road.  The conditions were pretty bad, I had to take my skis off and walk several times because of bare spots.  I think they must still be plowing this road.  There were a couple of snowmobiles that had already gone up the road right before I got there.  This year Cuchara has only gotten about one-fourth the amount of snow that it had gotten by this time last year.  However, that's working in our favor, since we're in a building project this year!  Hopefully next year they'll make up for it.  The mountaintop you see in the distance is the West Spanish Peak.  I'm going to climb that next summer!  (Who's coming with me?)


A Christmas tree at the Cuchara Mountain Resort.  We stopped so I could get out and take this picture, and I managed to lose one of my Pearl Izumi Windstopper mittens on the road.  I went back and found it, though.  Ha!
Don and me at the Dog Bar, New Year's Day.  This place is the only food establishment in Cuchara, and it was PACKED on New Year's Eve.  Pretty empty when we were there, though, thank goodness!

Christmas trip, wood stove project, furnace photos

Paul LaVigne of All That Is Energy in Trinidad, Colorado, came and installed the wood stove for us right before Christmas.  I think it turned out GREAT!  He took some photos and sent us.

 Another view of the stove.  It is made by a company named Kuma, in Idaho (NOT China!). 
 A view of the stove pipe.

Brett got the honor (?) of being the first one to build a fire in the new wood stove.   

It works, yay!  We hope that it will provide enough heat to keep the cabin warm most of the time, although we are also putting in a furnace to be on the safe side.  We also plan on installing radiant heat in the floors of both bathrooms to keep the feet toasty on those cold winter mornings (brrr!).

Because the house is not sealed or insulated yet, it was a bit above zero degrees inside when we were there right after Christmas.   We hope to get those projects finished in the near future.  The stove was able to get the temperature up at a balmy 20 degrees, though!  Looking down at the stove from the second floor loft.
 Another view from the top.

This is another view of the kitchen area.  The sink will be right below the window, with another counter along the wall on the right side of the room.  We are thinking about possibly installing a round table island around the post on the left-hand side of the picture to provide an dining bar and more work space.
This is a view of the downstairs guest bedroom, taken from the downstairs master (Linda & Brett's room).  You can see the ductwork for the furnace.  Soon it will all be hidden by the sheetrock, still to be installed.  We are still working out who's going to install the sheetrock (bids, anyone?).
Rough-in plumbing for the utility/mudroom and downstairs bath, and ductwork for the furnace.
 Furnace venting for the first floor.
 Another view of the downstairs guest room ("Mama's Room," she's already buying furnishings for it!).
 A view of the upstairs bath.  The bathtub is inside the cardboard box!
 The upstairs guest room.  We're gonna stack people in this room like firewood!
 The upstairs master, AKA Don & Fran's room, seen from the upstairs bathroom. 
A view of the basement equipment room.  That furnace is a MONSTER!  It should keep things toasty warm.  It contains a bunch of high-density ceramic bricks, which store heat during the periods when energy costs are lower (I guess night-time?) and release it as needed.  You never see anything like this in Texas, but it's pretty common in Colorado, although most people have the room units, not a full-house furnace.
 I should have gotten a person in this photo for perspective.  This thing is massive.
 Some of the furnace's ductwork in the basement.

It kind of reminds me of the robot on "Lost in Space."  I bet it is really scary down here after all the walls are in and it's dark.


This is the stack of aspen tongue and groove boards for the ceilings.  I believe that Brett's brother Mark and a friend of his will be installing this after the foam insulation has been put in.

The staircase going up to the first floor from the basement.  The button on the right is the garage door opener.  It also has a motion detector, so the basement light comes on when you're walking down the stairs.

A view of the roof underside.  The foam insulation will be put in soon, then the aspen ceiling (can't wait for this!).
 The underside of the roof on the left, with a tiny view of the underside of the loft visible on the right.
 The downstairs bathroom. 
Downstairs master, taken from the bathroom.
 Rough plumbing and ductwork in the mudroom, looking toward the great room and front door. 
 Kitchen view, from the great room.